Surveillance card
If monitoring has been set up, the monitoring card can be called up. This shows the devices included in the monitoring and their status. Furthermore the geo-fences of the assigned tour are also marked.
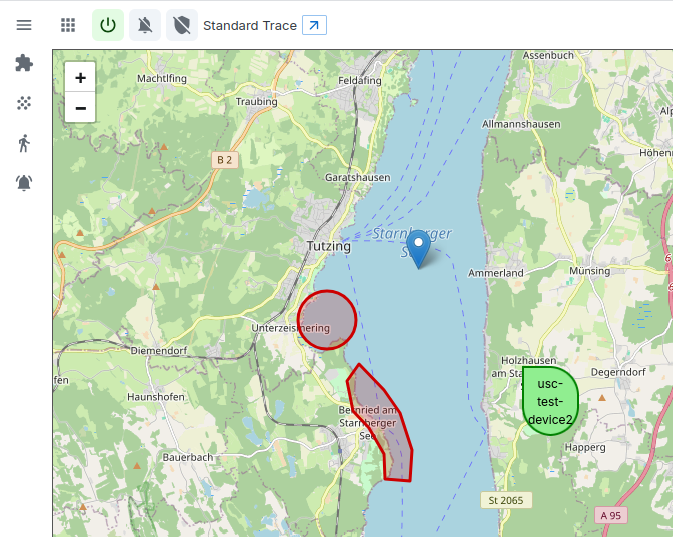
Device status
If a device is green, no alarm is active. The status of the individual Alarm scenarios can be displayed via the pop-up. To do this, click on the Device can be clicked.
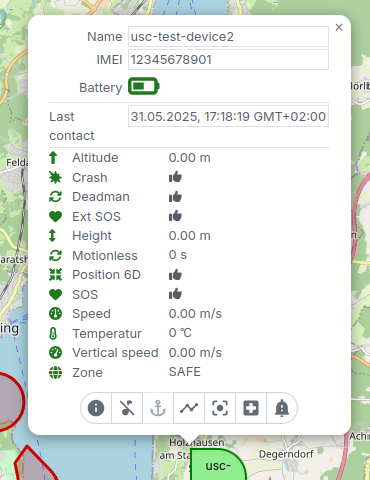
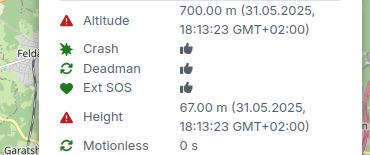
The pop-up shows the current status of the individual alarms. Depending on the alarm scenario the status can only be achieved by a or by concrete Values are displayed. If one or more alarms are triggered, these are is displayed with a red warning triangle. In addition, the time stamp of the Alarm start indicated. The device icon turns red.
If a CANCEL is now sent on the device, the following is displayed when the MUTE function is switched on the alarm is cancelled and the device turns green again. To make it clear that the alarm was only terminated because of the CANCEL command, the device icon turns green, but has but a shade of red.
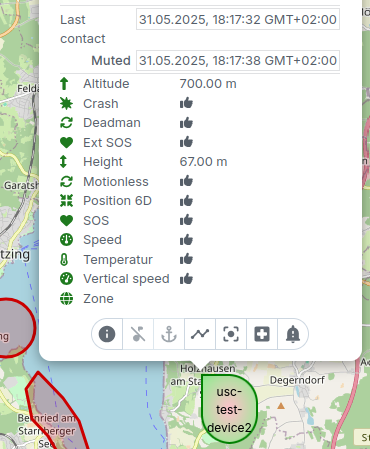
Above the alarm statuses, the pop-up also indicates that the device is in the is in the MUTE state.
Device actions
There are several action buttons in the footer of the pop-up, which you can use to can use:
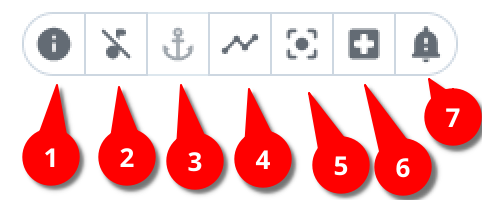
- Open the Inspector for this device to obtain the exact device data and alarm statuses.
- Set the device to a MUTE state from the browser. Attention: This should only be used in exceptional cases, as the device can then be used for no alarms are triggered for a certain period of time. As a rule, the MUTE triggered by the device itself (by CANCEL).
- Set an anchor zone around the current device position. This command can only be used if you use standard tracking and do not have any Floating fence. Once an anchor has been set, it can be further customised become.
- Display of a 24h tracking line
- Centre the device on the card
- Send a help message to a contact relating to this device
- Send a message to the device (only if the device has a message function)
Inspector
To see more precisely which data has been sent from a device, you can the Inspector can be used:
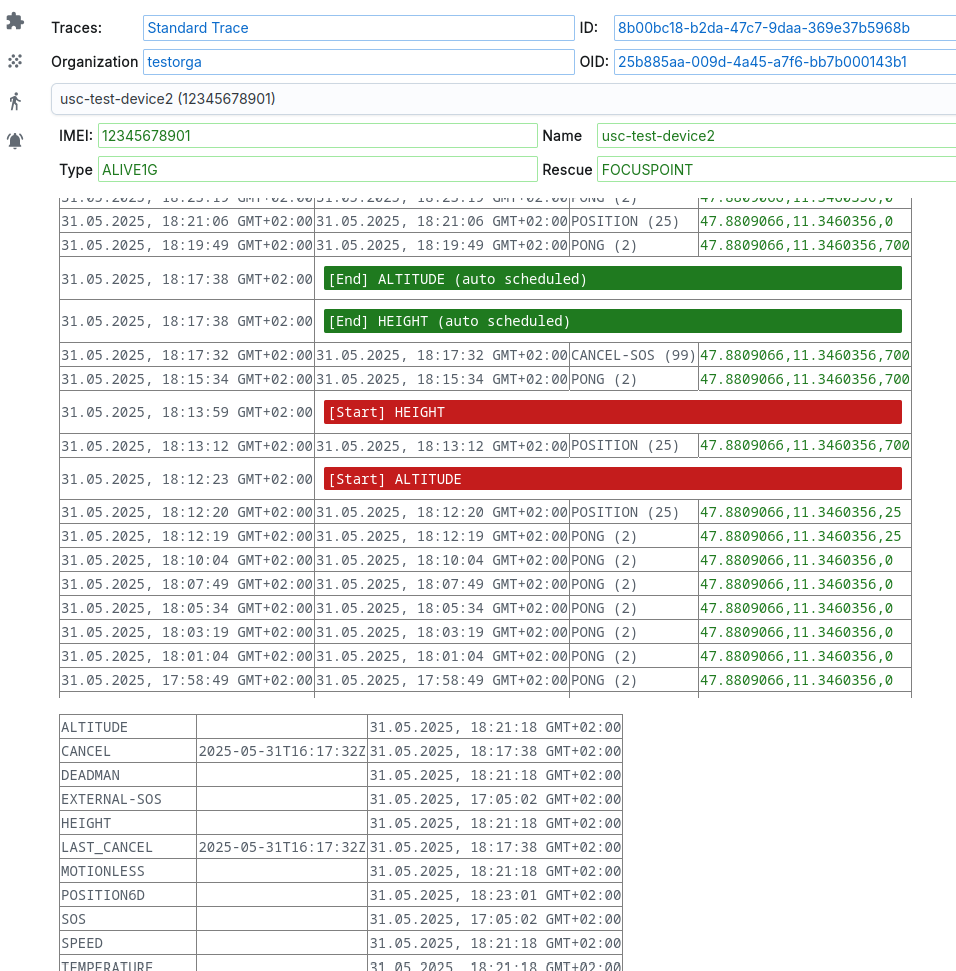
Here you can see a list of the last data sent by the device. You can click on each element to view the data in more detail. Between the Device data also shows when an alarm was started or ended.
Below the list of device data, internal monitoring statuses for to see this device. In most cases, an alarm function of the profile also saves a state of the same name; if this has the value “1”, the alarm is active.
In normal operation, you can ignore these states; the system reacts accordingly. However, if you receive a faulty alarm, you can use the Inspector try to find out why an alarm was falsely triggered (or was not triggered).
Menu
A menu is located above the monitoring card. The menu button itself allows you to call up the Inspector or change the configuration of the monitoring system change itself.
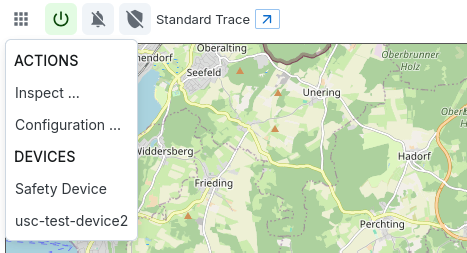
You can use the three buttons next to it:
- Activate/deactivate monitoring yourself
Deactivated monitoring no longer reacts to incoming device data, i.e. the position of the devices also remains unchanged. If a monitoring is deactivated, all devices are displayed in grey - Mute all alarms
If you want to keep monitoring active but no longer receive alarms you can use this function. Notifications are then no longer triggered. However, the monitoring map will continue to be updated, i.e. the Device pins are coloured when an alarm is triggered. - Switch escalations on/off
Finally, here is a link to open the monitoring in a separate Windows.
Fast actions
The quick access bar is located to the left of the map. You can use this to quickly change the profile, tour or fleet during monitoring. You can also maintain the alarm matrix directly.

You can use this from top to bottom:
- Profile
- Fleet
- Tour
- Alarm matrix
customise.
If you have different tours or profiles, you can change them immediately; alternatively, you can also quickly switch to the specific object and edit.
Card actions
There are two action buttons at the top right. With the first one you can You can bookmark this monitoring. This is then immediately displayed below Of your menu as a private bookmark.
To the right of this is a button with an arrow.
You can use this to carry out some configurations or quick accesses:
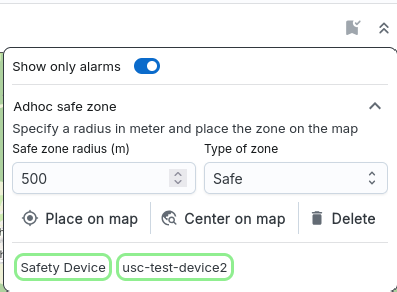
- The first option causes all device pop-ups to only display alarms. If a large number of alarm functions are activated in the profile, this option can be increase clarity.
- If you have set an anchor zone, you can use the next option change (size, position) or remove this anchor zone and also change the Change the zone type.
- Finally, all devices on the card are shown in a list. Depending on Alarm status in green or red. You can then directly access such a device and the map immediately zooms to this device.
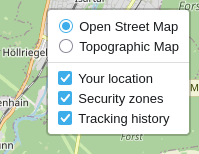
Card layer
You can also use the card’s layer control to configure which data should be displayed on the map. You can also use this to improve the clarity increase, especially if you have a lot of geo-fences, for example, which you do not necessarily always have to see.